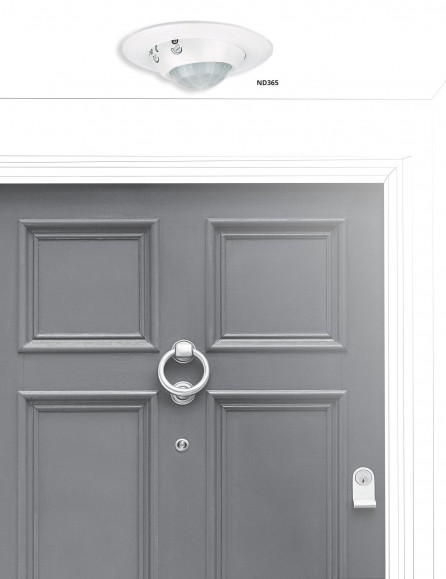
HOW DO SENSOR LIGHTS WORK?
Understanding how sensor lights work can help in finding the right lighting solution for your next project - and understand which options will be the right fit for your space.
Firstly we'll cover the three main types of sensor lights. Then we'll move on to common trouble shooting and installation tips to help you get the most out of your Sensor Light model.

What are Dusk to Dawn Sensors?
Dusk to Dawn lights are designed to automatically switch on as the natural light begins to fade. This automation is triggered by the amount of light that reaches the sensor.
So when installed correctly, the light will turn 'On' after the sun has set (dusk) and turn 'Off' when the sun rises in the morning (dawn).
Providing efficient power usage thanks to the automatic switching, meaning the lights are only on during night time hours.
This can be ideal for where constant night time lighting is required, for the purpose of lighting up a sign or if you wish to deter burglars or loiterers.
What are PIR Motion Sensors?
A passive infrared sensor (PIR sensor) is an electronic sensor that measures infrared (IR) heat radiating from objects in its field of view.
A PIR Motion Sensor is designed to detect "Warm Movement" from it's field of view, and switch the light on when this is triggered. This "Warm Movement" refers to any object passing by the sensors detection zone that gives off heat, such as people or animals approaching the light.
This type of sensor light can provide a sense of security to the property owner, as they know the lights will switch on and the space will brighten as they approach. While also acting as a deterrent to any not so welcome visitors, as the light will flick on as they get close to the property.
PIR Sensor Lights can often be adjusted to suit the users needs, depending on their space and need from the product. Common settings that can be adapted on PIR Sensor Lights are:
1. SENS - Sensitivity/distance of detection is often adjustable from just a few metres from the sensor to larger distances.
2. TIME - The length of time the light stays "On".
3. LUX - At what light level the light will be switched on. You can chose to switch it on during the day, when it's getting dark or when it's completely dark.
Note: Every PIR sensor/light will offer different settings - so it's important to check the sensors offering before purchasing.
What are HF Occupancy Sensors?
High Frequency (HF) Occupancy Sensors are a great option for those spaces that require longer periods of "switched on" light.
HF Occupancy Sensors actively scan the detection zone for the presence of movement. If movement is detected, the light stays on. If no movement is detected over a given time (set by the user), the light automatically switches off.
Thanks to their echo based technology, HF Sensors can detect small movements such as typing or chairs moving. Making this type of sensor lighting ideal for setting such as offices - while there are people in the office and movement happening, the lights will remain on. When everyone has gone home, the lights will turn off, providing efficient light usage and minimal wastage.
Installation Tips For Sensor Lights:
Important: We recommend all sensor lights should be installed by a registered electrician and wired from it's own isolating switch not shared by other lights.
- The general recommended mounting height is 1.8 to 2.5 metres
- Position the light in a protected area away from direct exposure to the weather
- Avoid installing near temperature variation zones, such as windows or air conditioners
- Do not aim at reflective surfaces - such as water
- For PIR Sensors: For best sensitivity the sensor should be pointing across the path of expected movement - and not directly up the path
- Keep face of sensor clean from cobwebs
Problem Solving For PIR Sensor Lights:
The location of the installation is most important for trouble free operation.
False Triggering:
- If triggering occurs, relocating may be required
- Stormy weather can cause triggering and the unit does become more sensitive in cold weather
- Redirect sensor away from reflective surfaces or heat sources
- As the lamp heads create heat, ensure there is a gap from the sensor
If The Lights Won't Turn On:
- Check the isolating switch is on
- Sensitivity is less in the summer
- Turn the LUX switch towards the sun icon
If Lights Won't Turn Off:
- Turn off the isolating light switch for 30 seconds then turn on again
- Redirecting the sensor may help
NOTE: Once the detector has sensed movement & the light is still on, a second movement will add further 'On-Time'
Problem Solving For HF Occupancy Sensors:
Important: Install using a registered electrician only. For indoor use only. Install with power supply on an independent isolating switch.
Cautions for Installation:
- Do not mount near radiators and moist areas
- Mount sensor level
- Time and daylight settings can be made during the day or night
- Do not change the time and daylight settings abruptly
- To get the best results for the daylight setting, adjust starting at the minimum setting and incrementally turn towards the maximum until you find the correct setting for your space
- After you determine the right setting of the daylight, you can arrange the time as you need
- This type of product senses small movements so you should be careful when adjusting to the maximum distance
- Avoid mounting the detector close to objects than can cause rapid temperature changes such as heaters, fans, refrigerators etc.
If lights Won't Turn On:
- Check the lamp is not blown
- Check the main light switch is turned on
- Increase Lux setting
- Increase sensitivity
If Lights Won't Turn Off:
- Movement is being detected
- Reduce Time and Lux settings
- Reduce Sensitivity - the sensor might be detecting through thin walls
- Reposition the installation
Change in Sensitivity or Reliability of Unit:
- Remove heat or moisture source
- Reposition Installation
Navigation
- Outdoor Lights Materials and Finishes Guide
- Lamps – Light Sources
- Control Gear Information & Trouble Shooting
- IP Rating Chart
- Declaration of Compliance with Standards
- Bulb Terminology and Identification
- 12Volt DC Supply LED Strip & Module Planning
- Advantages of the Superlux LL and LLED Garden Lighting system
- 12 Volt Garden Lights
- The Different Purposes Of Lighting
- Lighting For Different Areas
- A Guide To Installing Lights
- Energy Efficient Lighting
- Colour Temperature Guide
- CRI: Colour Rendering Index
- Uniform Downlight Spacing Formula
- Downlight Classification Guide
- Lumens: What Are They And How Much Do I Need?
- Lux: What is it And How Much Do I Need?
- Globes With 60mmØ Fitter Included
- How Do Sensor Lights Work?
- What To Do If I Have Moisture Build Up In My Light Fixture?
- Latest News
